I am mostly doing this post to help me remember how to do this, but hopefully someone else will find this post helpful.
So, if this does not interest you, please feel free to skip the lesson.
This method works when you add albums links to pages but not posts. I don't know why.
Step 1.
Insert an image like you normally would do in Blogger. Insert the image that you would like to have as your album cover.
 |
| The New Album |
This is where the interesting part happens:
Step 2.
Go to the Google Photo Album and Click the 3 little dots in the upper right hand corner of the album.
This menu should appear:
Step 3.
Select the 'Share album' link and you should have this:
Step 4.
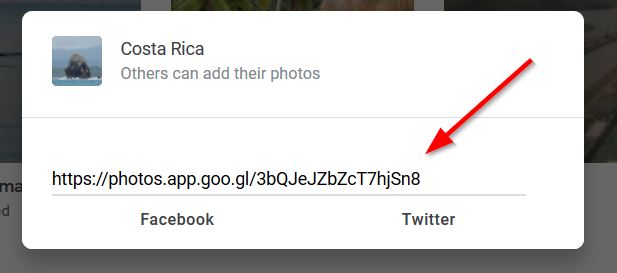
Click the "Create link" button and you will be given a link that is the link for the entire album.

Step 4.
Copy the link.
Step 5.
Now go back to the Blogger page where you inserted the cover picture of your album.
Click on HTML code button and look for the part that is in a format like this below. Look just before imageanchor="1"
The highlighted text above is the location where the browser will take you when you click on the picture.
Before editing, the browser takes you to a picture, after changing the link to the album shared link, the browser will take you to that shared album instead.
Step 6.
Replace the original yellow highlighted HTML code with the shared link that you copied from the album. Only replace the part between the parentheses and leave the parentheses
It should look like this:
You can also edit this section of HTML to change the size that the album will be on your page. In the example above, it is 150 pixels high by 200 pixels wide.
When done, Click the 'Compose' button, the 'Save' button, and press on.
One last thing, remember to turn on Share for your album.
That's it. Hope I didn't geek out too much.


