Sunday, May 7, 2017

Wet & Wild Sanding


Most antifouling sanding is done with electric or air grinders.  This makes lots of toxic dust which is unhealthy to breathe and also gets deposited and tracked all over our boat and neighboring boats.  It also clogs the sandpaper rapidly.   

I have had good luck in the past with water sanding.  The water washes the paint off the sandpaper and keeps everything cooler so the paint doesn't melt and clump up.  In Mexico, I strapped the hose to the grinder head, made a fiberglass cover for it, and it worked well.  In Australia, Booker sprayed water on the sanding disc while I sanded.  The big problem when using water and an electric sander is the potential of getting shocked.  


Hutchinson Sander
To solve this problem, I bought a Hutchins 7544 Random Orbital Sander.  This is a pneumatic sander with water injection.  Once arranging for the use of an air compressor, we found out that 'Random Orbital" actually means "vibrating".  There is no "orbital" whatsoever.  It just didn't have the guts to sand thick antifouling even with 30 grit sandpaper.  So we need to find a plan "B".


Malaysia is a 240 volt country.  I can't use their electricity to run my power tools.  I have to use the onboard AC inverter.  This makes 110 volts from the boat's batteries and I have discovered that it acts surprisingly like an isolation transformer.  


The best way to explain this is that after doing it's work at the motor, the electricity only has one path to return to the battery, which is through the power cord.  Since there is no path to earth, it can't travel through your body and out your feet giving you a shock.  This is called a Floating Ground.   

***Please do not try this at home or tell my Mom.


Here we are doing the wet sanding.  Booker is doing the spraying and I am doing the sanding.  The green tint is from the sun shade cloth. 

Unfortunately the water sprays everywhere so we are wearing Tyvek suits and hoods.  It is about 100 degrees and we are always trying to work in the shade.


Saturday, May 6, 2017

Cheap Labor is Not So Cheap


I contracted with some guys in the boatyard here in Malaysia to remove the antifouling paint.  The daily rate for a worker is about $45. That may sound cheap but when the skills that we normally take for granted are not accompanying that labor, inefficiencies result.  

I can sand with 20 grit (very course) sandpaper on a grinding disc and stop at just about any layer of paint that I want.  An unskilled Malaysian will oversand and destroy the bottom of the boat with gouges when using 20 grit sandpaper so I have to give them 80 grit.  The sander with finer sandpaper takes 4-5 times longer and also uses up that much more sandpaper.  Our Malaysian worker was able to sand one and a half square meters per day.  At that rate, it would take 60 days to remove the antifouling paint at a cost of around $2700 plus sandpaper plus I would have to add my time to supervise.  Almost the same price as I was quoted in Australia for removal via abrasive blasting.

If you're doing anything more complicated than ditch digging, cheap labor may not be the way to go.

Monday, April 24, 2017

Autopsy of a failed thru-hull fitting


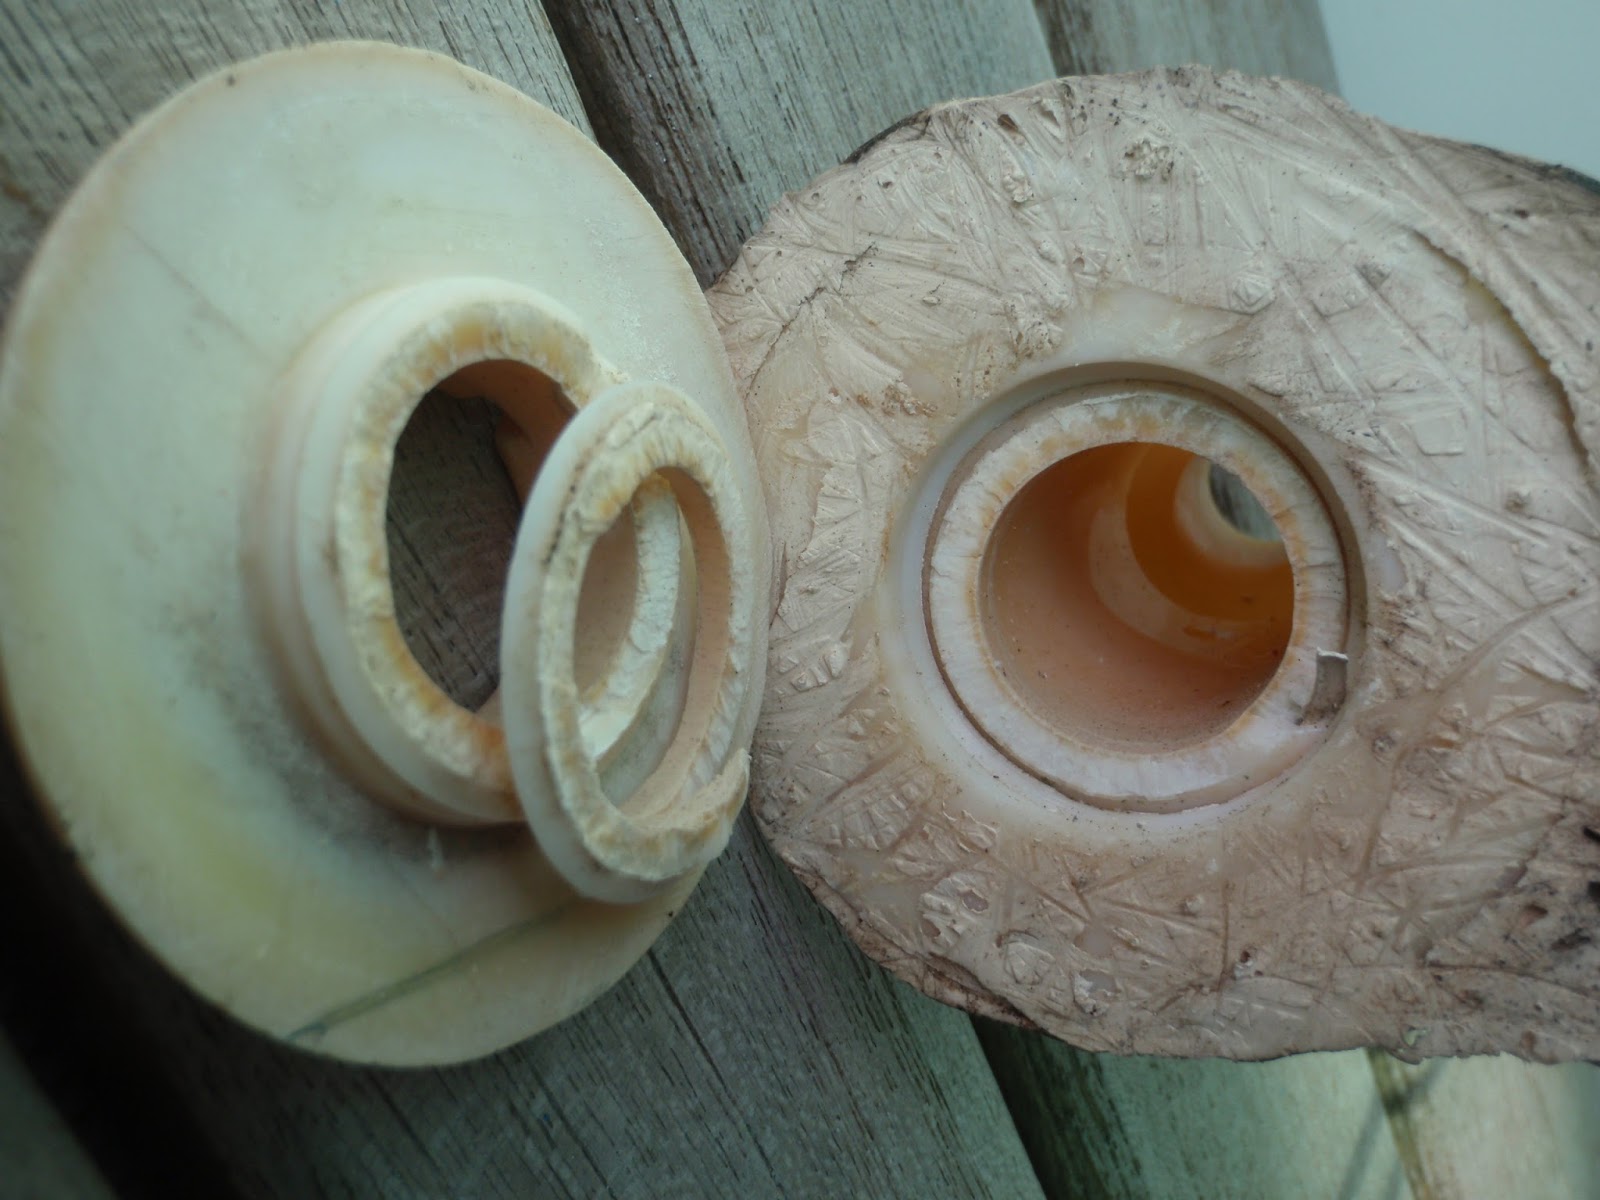
Overboard is to the left, hose connects on the right

A thru-hull is a fitting that is used to connect the outside of the boat to a hose on the inside.  They are usually used for water intake and overboard discharge (In and Out).  Bronze is used below the waterline because a failure there could be catastrophic.  Plastic is usually used above the waterline on fiberglass boats.  Tortuguita has 25 fittings above the waterline and 15 below.


In order to prepare the boat for gelcoat work, all the plastic thru-hulls were removed and will replaced with new ones when the work is done.  

I really didn't suspect there were any problems but had quite a surprise and can now explain some mystery water leaks.

This is a thru-hull that is for the forward shower drain pump.  Since we don't use these showers, we didn't notice any significant leaking.  However, when a wave would splash up, it was apparently leaking in through the crack and had been seeping into the boat.

By the yellowing of plastic, these were old cracks
On the other forward shower drain, I found a broken 'tail' under the hose clamp and a crack at the outer hull.  Privilege likes to hide things like thru-hulls in hidden compartments that require quite a bit of work to access.  Since I never needed to replace one of these hidden thru-hulls, I had no reason to dig into these false compartments.

Many of the failures are from over-tightening the big nut on the back.  This cracks the plastic at the outside edge.  This particular thru-hull was also cracked at the inside edge which is usually caused by vibration or pressure fatigue.


New supply of 25 TruDesign fittings
Cheap thru-hulls like the ones that were just removed are made of nylon.  My research led me to only 2 brands of decent replacements.  Forespar (US) makes a product out of a proprietary plastic called Marelon.  TruDesign (NZ) makes their thru-hulls out of fiberglass reinforced nylon.  In this part of the world, it made more sense to go with the New Zealand brand.


Besides having a boat that is not leaking, the really cool thing about this whole project is now I know of more secret compartments to store things.

Monday, April 17, 2017

The Workbench


The normal boatyard workbench, pallet style. (Australia 2014)
When working on a boat, it is important to have a table or the like where you can put  things that are being worked on.  In a boatyard, that usually consists of something scrounged like a pallet or boards and if you are lucky, maybe a sawhorse or two.

Marina Island is different.  People are here for years working on their boats, and we may be also.  After all, we made the investment to buy a car and we really do like it here in Malaysia.

If you happen to be carrying carpentry tools on the boat, it is easy to knock out a table or bench.  Our woodworking tools reached the end of their lives in Mexico and since the voltage here is 240 volts, anything that I buy will be all but worthless in the US.

I had the opportunity to buy a workbench from Andy on SPRUCE that was originally built by Jeff.  The price was a reasonable $90 US and it was even equipped with a vise.  In the end, I will end up selling it to someone else and recoup some of the cost.

Even rolling on wheels, it was a hard push
The really nice thing about the bench is that it has locked storage underneath.  Instead of chucking tools in the car at the end of the day, everything can be stored in the bench.

This thing is really heavy.  It has to weigh 250 pounds and is built from some type of local tropical hardwood.  A forklift would have been nice to move it from the shed area to Tortuguita but since there wasn't one, we examined all the options to move it about a hundred yards.  We found an engine hoist on wheels sitting around and commandeered it to do the heavy lifting.


Workbench, vise, all out of the sun and rain in our catamaran garage

Now we have a proper workshop under Tortuguita which is so much better than the rickety pallets that we have used in the past.

My only regret is that I can't keep it.  Sure would look nice at home in the US.

Tuesday, March 21, 2017

Too much paint over the years


Every year, when Tortuguita is hauled out of the water, the bottom gets painted with antifouling paint.  This paint keeps the sea creatures from sticking to it by a combination of biocides and ablation.  Ablation is a continual sloughing off process over time.  Ideally, after a year of cruising, all the paint should be worn off.  That way there would be no yearly build-up.  It never works that way since if all the paint ablated, there would be barnacles stuck to the boat where there is no paint.

Ablative paints are can be hard or soft.  Soft will ablate easier and is good if the boat is sitting for long periods in a marina but will wear off faster when moving.  Hard is better if the boat is moving but doesn't sand off very easily. 

Pressure washing and light sanding are usually all that is required prior to a new coat of paint.  Usually 2 coats are applied with more at the high turbulence areas such as keel and waterline.  I figured out that we have 12 layers of paint with 24 layers at the waterline.  The total weight of this paint is around 300 lbs.


I've never seen this anywhere, but from the appearance of the cracks in our paint, I have determined  that if you apply hard ablative over soft ablative paint, it is like building a concrete road on mud.  The hard paint will move around and crack.
As long as the hulls are in the water, everything was fine.  But, with the boat sitting on land in the heat of the tropics, the paints will expand and contract and the hard layers that sit atop the soft layers cracked.

The only way to fix this is to completely remove all the paint.

In Australia we got a quote of $3000 for removing the antifouling by abrasive blasting.  This process is not very accurate and also removes the fiberglass layers.  

I figured that since we were going to a part of the world with cheap labor, that I will save money by waiting so I just sanded the cracked paint at the waterline and off we went to S.E.Asia.

Saturday, March 18, 2017

Is the fridge supposed to be warm?


Those words strike fear in the hearts of just about every cruiser.  Our air cooled Frigoboat AH35F refrigeration was installed by the previous owner and has worked flawlessly since we bought the boat.

The most likely culprit of a failed fridge is the evaporator plate.  It is made out of thin painted aluminum and a small bit of corrosion can cause a leak.  This is a $100 fix.

The next most likely cause is the compressor.  Either the actual compressor or the electronic controller could cause this malfunction.  These cost $300 and $200 respectively.  The good thing about these units is that one company, Danfoss, makes them and spares are available everywhere.
The compressor seemed to be running but not very hard.  The current draw, which is usually around 6 amps, measured only 2 amps.  When attempting to release some gas from the access valve to see if there was pressure in the system, nothing came out.    Could be the valve, or more likely, there's a leak somewhere.

We carry freon charging hoses and guages.  Usually you can buy 12 oz cans of R134a freon at the auto parts stores.  It's the same as used in automobile air conditioning.  Not here in Malaysia apparently.  All you can buy here are 30 lb. tanks.  I found a guy that had one with about 1/4 remaining so I bought it from him.

New High Temp HNBR O-ring Installed
I pressurized the system with a little freon and immediately found the leak.  Turns out that it was a failed o-ring at the quick disconnect fitting.


With that fixed, I did 5 fill/vent cycles to get most of the air out of the system and then did a full system charge.
Purging and Charging the System


Two good references to use for servicing these little systems are:


and

Evacuation Procedure without a vacuum pump
1.  With the new compressor installed, turn on the compressor and depress the access valve on the high side of the system.  Monitor the pressure on the low side of the system.  When the pressure is as low as it will go, close the access valve on the high side of the system and turn off the compressor.  This process will take about 5 minutes.
2.  Charge the low side of the system to approximately 14 psi.
3.  Wait about 3 minutes for the pressures on the high and low side to equalize.
4.  Turn the compressor on and depress the access valve on the high side.  When the pressure on the low side is as low as it will go, let the high side access valve close and turn off the compressor.
5.   Repeat steps 2, 3 and 4.  Note, on successive evacuations, the low side pressure will not go as low because of the absorption of refrigerant in the compressor oil and it’s slow release.
6.   Charge the low side of the system to approximately 14 psi.
7.   Wait 3 minutes for the pressure to equalize.  Turn on the compressor and depress the access valve on the high side.  This time, when gas is no longer coming out the high side access valve, let the valve close.  The air is now purged from the system.
8.   Charge the system with the appropriate amount of refrigerant and turn on the compressor.
9.  Make appropriate adjustments in system charge if necessary.

Thursday, March 16, 2017

Anchor Chain Re-Galvanizing


Our first anchor chains were 200 and 100 ft lengths.  One for each anchor.  The standard length comes in a 200 ft drum.  That chain cost $800 lasted 3 years.  It was replaced in 2009 and ended up completely corroded in 4 months.  Fortunately it was under warranty due to a bad galvanizing process.  Our current 300 ft chain was bought in 2009 in Ft. Lauderdale from Secure Chain and Anchor for $1000.  They were really great and were able to cut the 300 ft piece from a longer 1000 footer.  The price of $3.30/ft was also much better than the chandlery price of $4.50/ft.

We have an anchor on each end of the chain and find it very versatile for using as either one very long run for deep water or splitting the difference while using two anchors for more security in more shallow water.

The chain was getting pretty rusted at the most used end but did seem to have some life left in less used end compared to other boats here in the boatyard.  It would have made it a few more years but would have taken a toll over that time with thinning and corroded steel links.

As luck would have it, the marina office was arranging a galvanizing run to Butterworth, Penang.  There were 3 of us sending our chain and 2 were sending their anchors.  My share of the transport was $.30/ft.  The chain cost $1.50/kilo ($1.00/ft) for double dip.  Sounds like an ice cream cone.

All dressed up and nowhere to go


So for $1.30/ft we are now able to keep our hard to find 300 ft length.  Keep it in better condition from corrosion, and hopefully it will last another 7 years.