Sunday, March 24, 2019

Cockpit Prep


Cockpit Yoga to remove screws

Even though there are lots of bits and pieces attached to a hull, the majority are in the cockpit. 
  
If you remove these things, it gives you a chance to re-bed them correctly during while reinstalling them.  It also allows the new coatings to seal the area underneath and not cause a ridge from taping the fitting.


Just about everything in the cockpit was removed.  Winches, clutches, blocks, screws, hinges, everything.  


Winch pad after removal.  Dirty mess
The best thing about removing everything is that it allows you to sand and buff the areas easier.


The biggest pain was the steering wheel which I will cover in a future post.

After stripping the cockpit of everything, it had to be sanded to remove the years of dirt, spills, teak oil, and grease that had accumulated over the years.


Everything has been sanded - Notice cored hinge screw holes

Round sanding block

Sunday, March 17, 2019

Coring in 7 easy steps


Most fiberglass boats have some type of core material like wood or foam which helps add strength while keeping the weight down.   

Privilege catamarans are fiberglass with divinycell foam core.  When screws and bolt holes are made in the fiberglass to mount something, the something is caulked to keep water from getting into the core.   

Ultimately all caulk leaks and water will, and has, infiltrated into the core.  Once it is in there, it usually stays localized but may stay there forever.   Worse yet, with a wood core, the wood will rot.

Since we removed every bolt and screw for the spraying, it was a good time to take care of these problematic holes.

A couple of things that are not shown which are nice to do are leave the hole open to the baking sun for as long as possible to remove any old moisture and when reinstalling the screw, I preheated it in boiling water to help it slightly melt the epoxy plug instead of cracking it.

Here is the coring process I used:

Originally installed snap

Snap removed, notice superficial gelcoat stress cracks

Drill with a step drill to avoid chipping the gelcoat

Drill out the core.  Do not drill through inner fiberglass

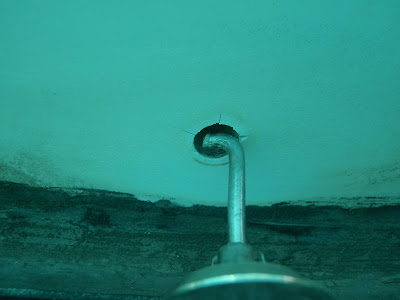
Use a bent nail in a drill to remove core material

Tape the hole and use the step drill to make a nice clean hole in the tape

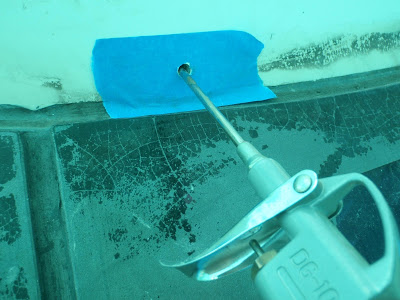
Spray out all the dust and old core particles

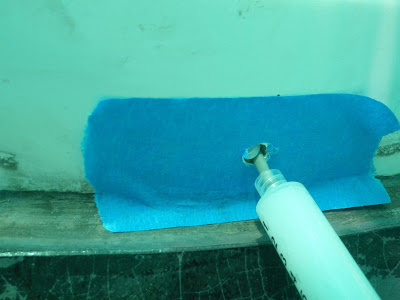
Inject Epoxy throughout the hole

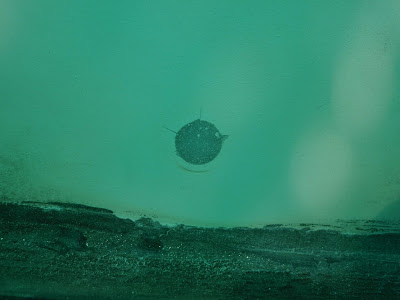
Solid core plug.

Drill a hole for the screw

Completely watertight.   Finished

Tuesday, March 12, 2019

Spraying the deck


Sorry, it has been too long since I updated the blog.

Since our refit project is so huge, and we are the only ones doing the work, our time in Malaysia seems like Groundhog Day.   The boat work is the same and never ending.

Since our technical details and engineering have been worked out, there is just a lot of grunt work.

Our continuing work on the gelcoat refinishing has moved from the sides to the deck level.  I didn’t think this was going to be such a big deal but boy was I wrong.  The surface area to be sprayed is much less than the sides but the taping and plastic-ing (not a word) was much more than expected.  Also, working on the deck is like painting a floor, you have to plan your path very carefully or you will end up with a hose or footprints running across newly sprayed areas.

We also kept the daily spray areas much smaller than expected with each area taking a day to sand, a day to tape, a day to spray, and a day or 2 to post-sand.  So it was easy to chew up our 3 month visa limit without having a lot to look back on.

Here are some pics from the deck spraying:  

What we are doing with the deck is refinishing the smooth gelcoat and leaving the existing non-skid original. 


A splice between spray sections.  Also you can see the yellowing of the original gelcoat

Even though the entire foredeck is taped, it still had to be sprayed in sections

This spray area was the part forward of the windows but aft of the crossbar

Mast to Trampolines. Taped, plasticked, and sprayed

After the spraying is done, the guide coat is wiped on and everything is sanded.  Since the gelcoat buildup is fairly thick, it will crack when pulling the tape and have uneven edges.  In order to avoid  this, the edges at the tape have to be finger sanded to the level of the tape so when stripping the tape, only a very small thickness of gelcoat is being cracked.

Sanded and stripped


Mast to Cockpit.  Each side had to be sprayed separately
When doing different sections, we left the plastic in place from the prior days and then sanded and stripped the entire area.